UBI Analytics – Duplicate, Edit, &
Publish My sheets (Finance)
Quick Reference Guide
Updated | April 19, 2023 UVAFinance – Reporting Page | 1
Overview
This QRG is designed to walk employees who have the EDW_P_Finance role with duplicating and editing an
existing sheet in a UBI Analytics module to create a new personalized My sheet. Publishing, unpublishing and
deleting a My sheet is also covered.
For best results, it is recommended that you use the Chrome™ web browser to access UBI
Analytics (Qlik Sense
®
).
Duplicate and Edit My sheet
For example purposes, the following procedure is based on editing a
straight table
in the
Workday Fund Balances module, but the same steps can apply to any UBI Analytics module.
However, other chart types, such as a pivot table or bar chart have different options available in
the Properties panel; but the general steps for adding and deleting dimensions/measures and
changing the appearance of your My sheet are the same.
Duplicate a sheet:
1. Do one of the following to access UBI Analytics:
To access by the…
Do this…
UBI User Hub
• Go to this link: https://ubihub.admin.virginia.edu/
• Search for and select the desired module.
Qlik Sense Hub
• Go to this link: https://qsenseprod.admin.virginia.edu/hub/
• Select the
Finance
stream.
• Select the desired module.
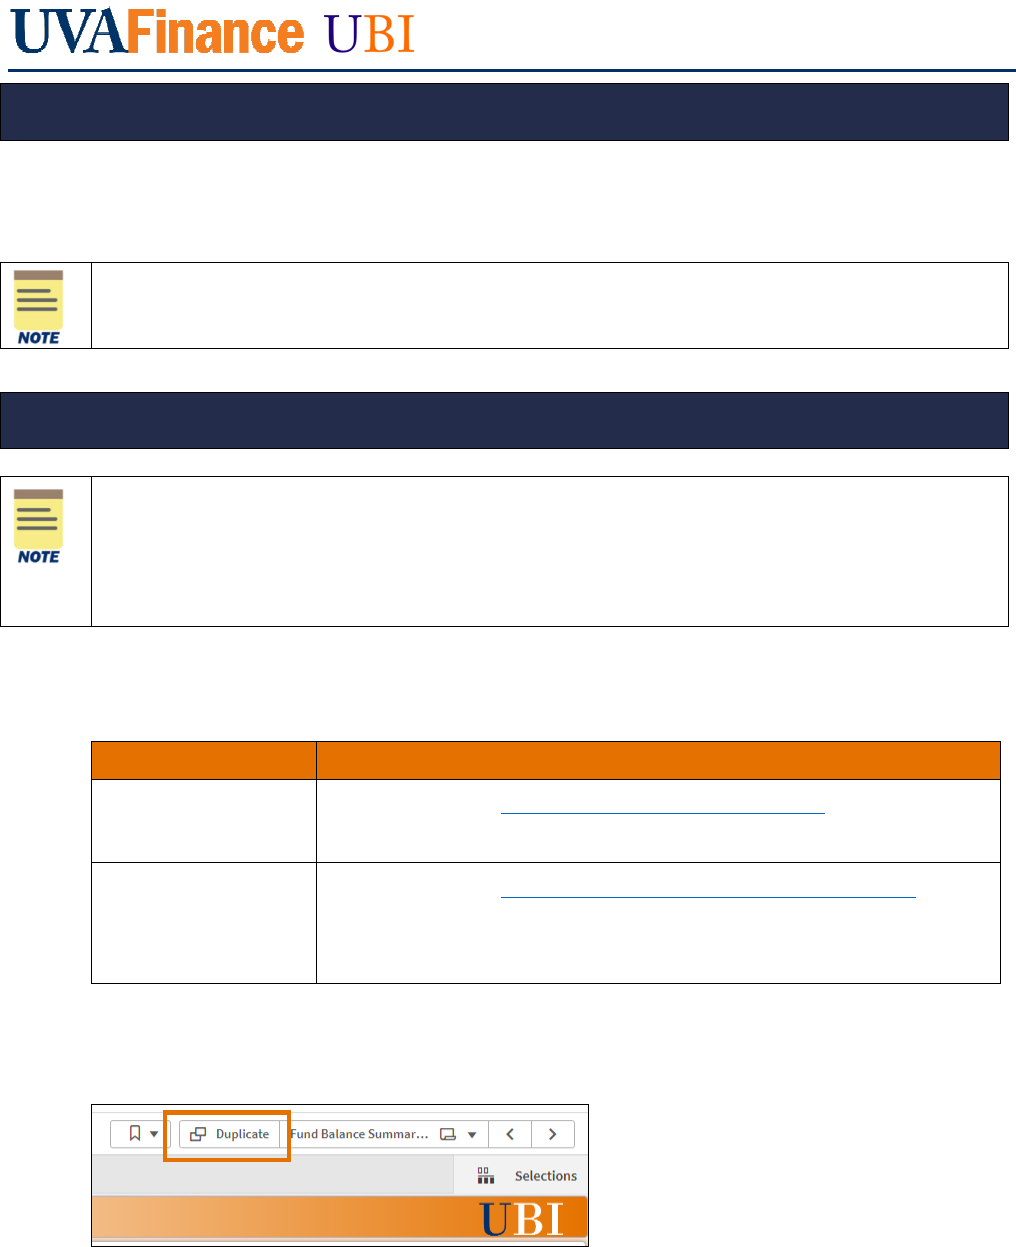
2. Select the Public sheet you want to edit.
3. Select your filter selections for viewing the data.
4. Click the Duplicate button at the top right of the screen.
A duplicate of the sheet is created, and the Properties panel displays on the right-side of the screen. The Sheet
title displays a (1) at the end. The number increments for each copy of the same sheet you duplicate,
UBI Analytics – Duplicate, Edit & Publish My sheets (Finance) – Quick Reference Guide
Updated | April 19, 2023 UVAFinance – Reporting Page | 2
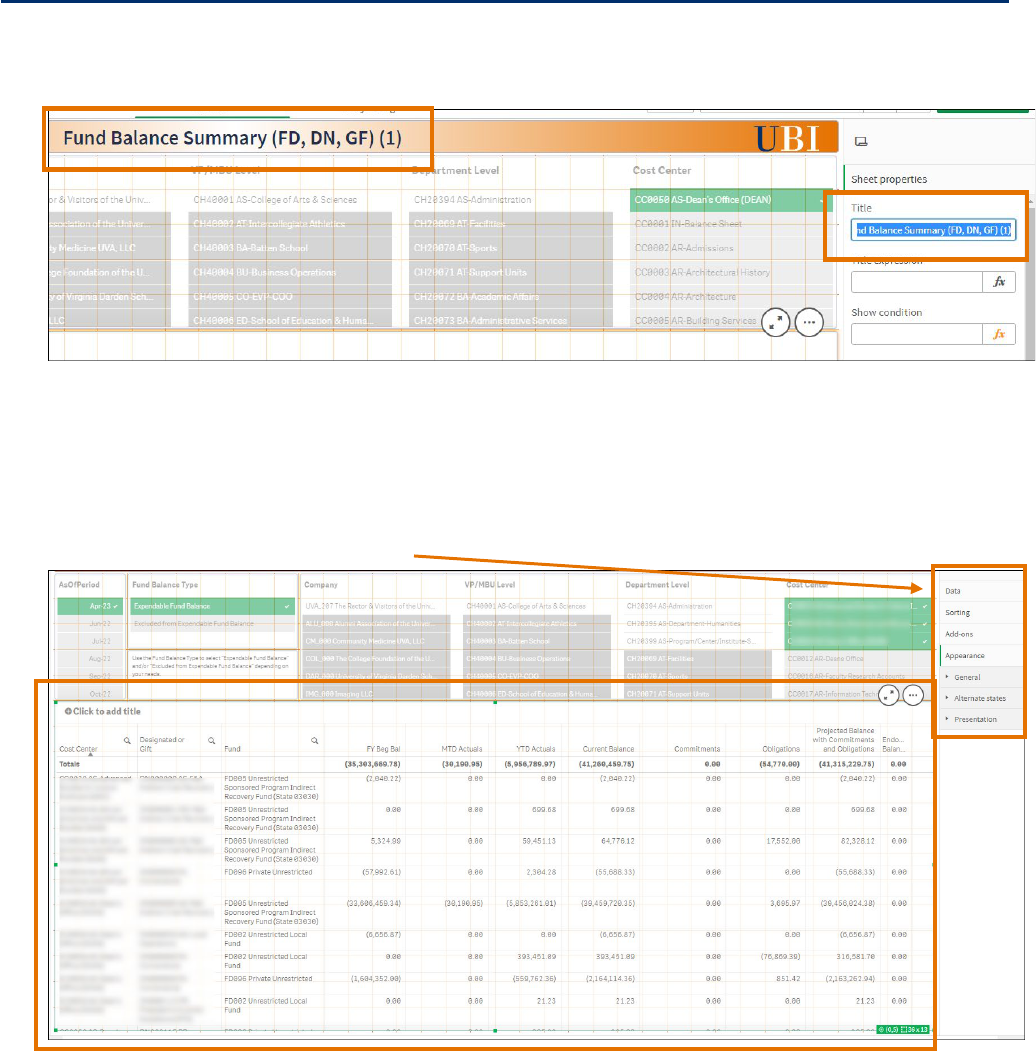
Change the Sheet properties:
5. In the Sheet properties, click in the Title field and update the Sheet title.
6. In the Thumbnail field, click the Change Thumbnail icon and select an image from the Media
library (In app or Default) and click
Insert. This is optional; you can leave the thumbnail as is.
Edit the table visualization:
7. Click the table visualization to select it. A “green” box displays around the table to indicate it has
been selected and the Properties panel updates for your selection on the right-side of the screen.
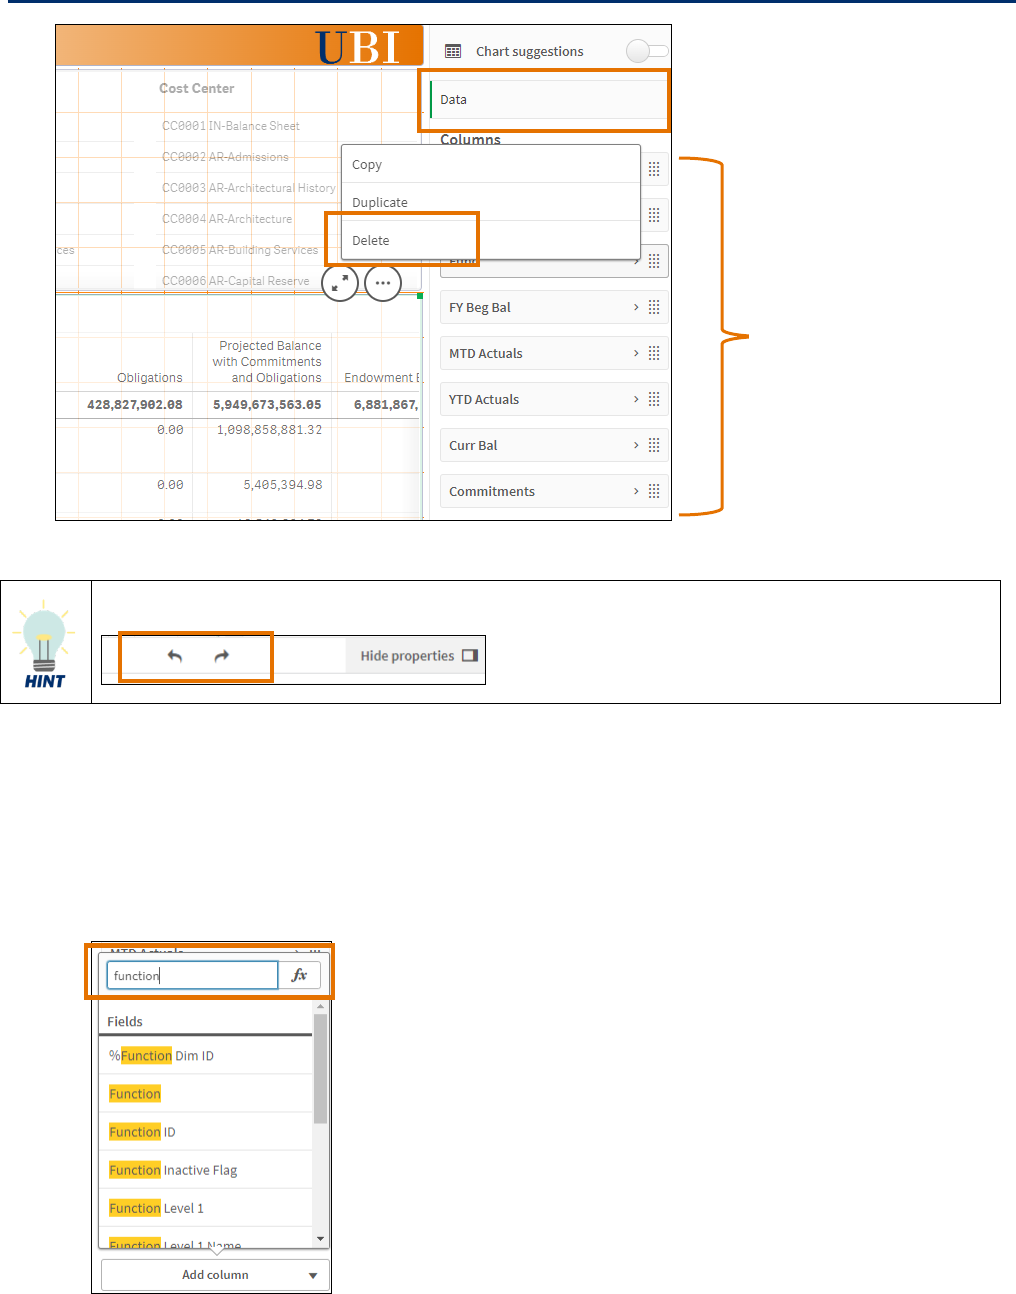
Delete a column:
8. In the Properties panel, select Data.
9. Right-click the column you want to delete and select Delete.
UBI Analytics – Duplicate, Edit & Publish My sheets (Finance) – Quick Reference Guide
Updated | April 19, 2023 UVAFinance – Reporting Page | 3
Use the
Undo
and
Redo
buttons at the bottom of the screen to undo or redo your last action.
Add a column:
10. In the Properties panel, click Add column.
11. Select Dimension or Measure depending on what you want to add to the table.
12. Search for the dimension (e.g., Function) or measure (e.g., FYTD Expenses) and select it from the
list.
Columns
UBI Analytics – Duplicate, Edit & Publish My sheets (Finance) – Quick Reference Guide
Updated | April 19, 2023 UVAFinance – Reporting Page | 4
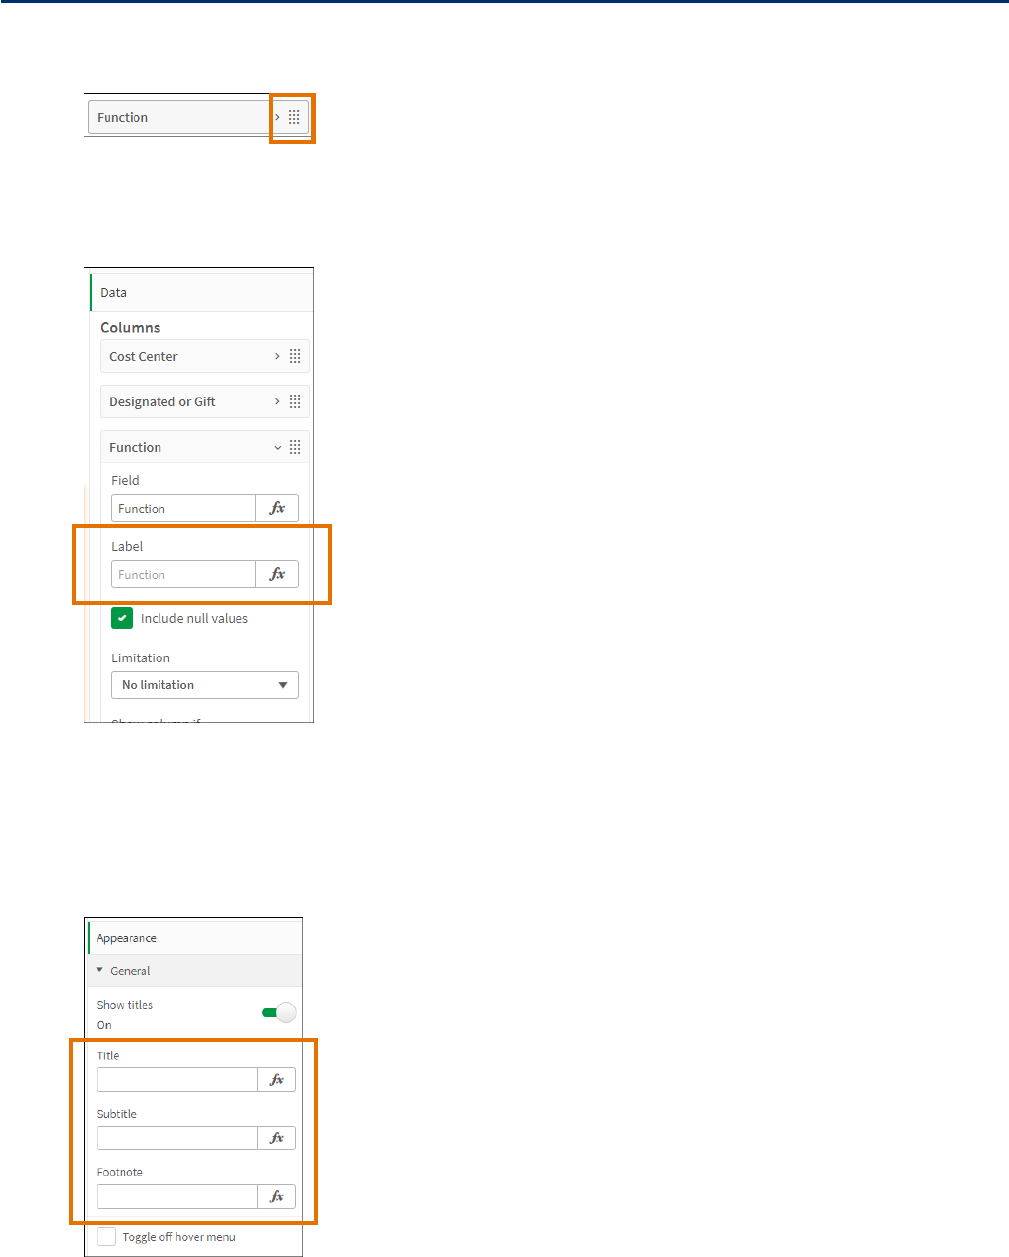
13. The column is added to the bottom of the list. Click the Move icon on the right-side of the label
and drag it to the desired location in the list.
14. Optionally, to change the name of the column, click on the column to expand it.
15. Click the Label field and type the new name for the column. This is the name that will display in
the table.
16. Repeat steps 10 – 15 to add more columns as needed.
Add a title, subtitle and/or footnote to your table:
17. In the Properties panel, click Appearance, then General.
18. Type a title, subtitle and/or footnote in the respective fields.

UBI Analytics – Duplicate, Edit & Publish My sheets (Finance) – Quick Reference Guide
Updated | April 19, 2023 UVAFinance – Reporting Page | 5
Change the presentation of your table (e.g., wrap text, fonts, freeze first column):
19. In the Properties panel, click Appearance, then Presentation.
20. Change any of the settings as desired. For example, disable totals from displaying in the table or move
them to the bottom
, type a new title for the Totals label, and/or enable Freeze first column.
21. Click Styling to open the Styling window.
Change any these
settings as needed
UBI Analytics – Duplicate, Edit & Publish My sheets (Finance) – Quick Reference Guide
Updated | April 19, 2023 UVAFinance – Reporting Page | 6
22. Change any of the styling settings as desired:
• font size and/or color
• row height
• highlight rows on hover
• scrollbar size
Finish editing the sheet:
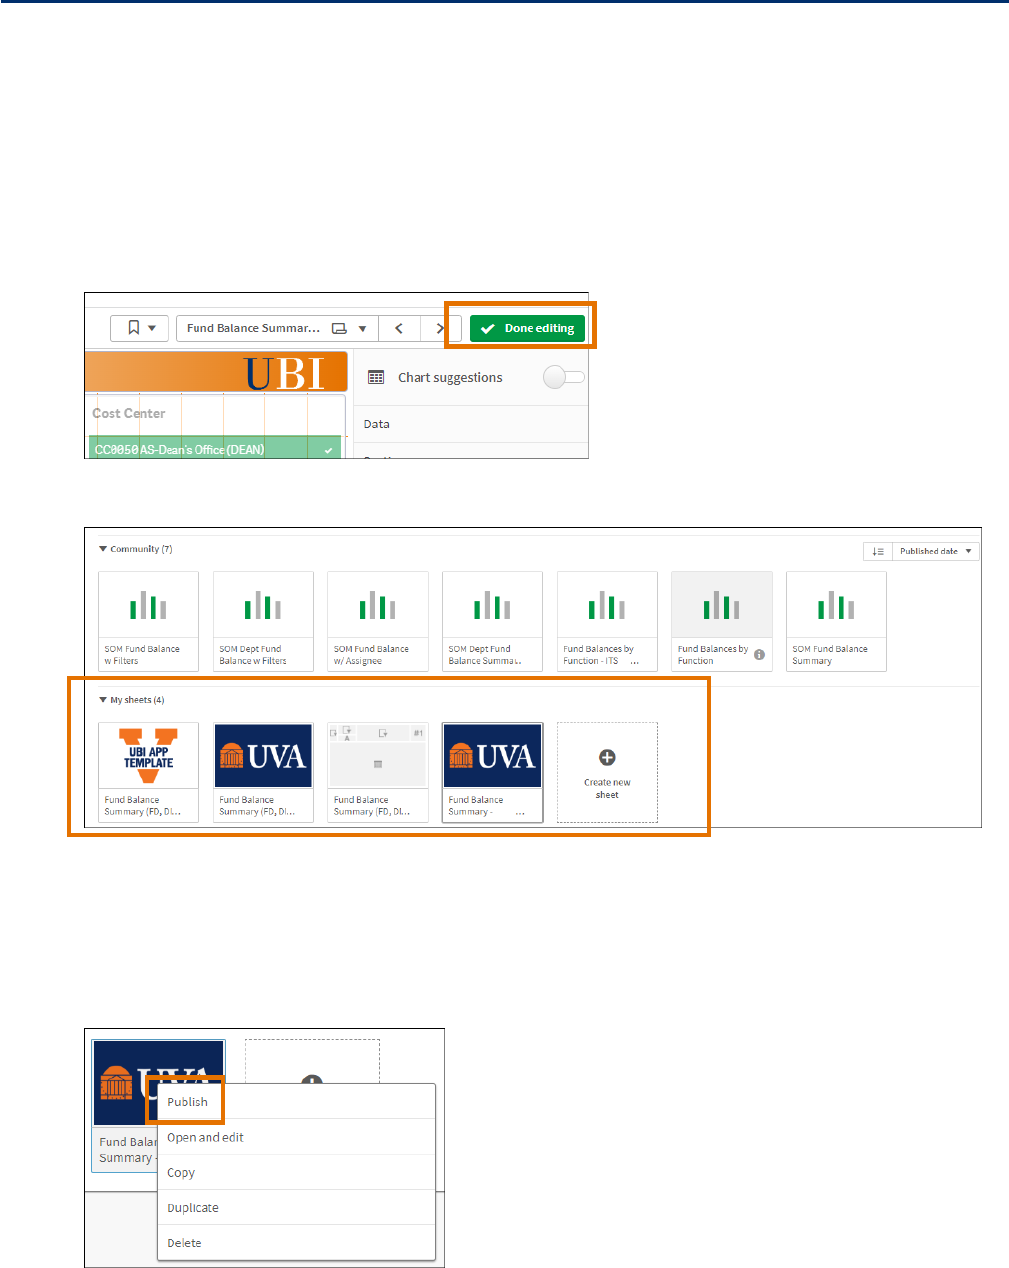
23. Click Done editing at the top right-hand side of the screen.
24. A thumbnail icon for your new My sheet displays in your My sheets area for the module.
Publish the My sheet:
You can publish your My sheet to share with other users. When you publish a My sheet, it displays under the
Community sheets.
25. Under My sheets, right-click the My sheet thumbnail.
26. Select Publish.
27. Click the Publish button.
UBI Analytics – Duplicate, Edit & Publish My sheets (Finance) – Quick Reference Guide
Updated | April 19, 2023 UVAFinance – Reporting Page | 7
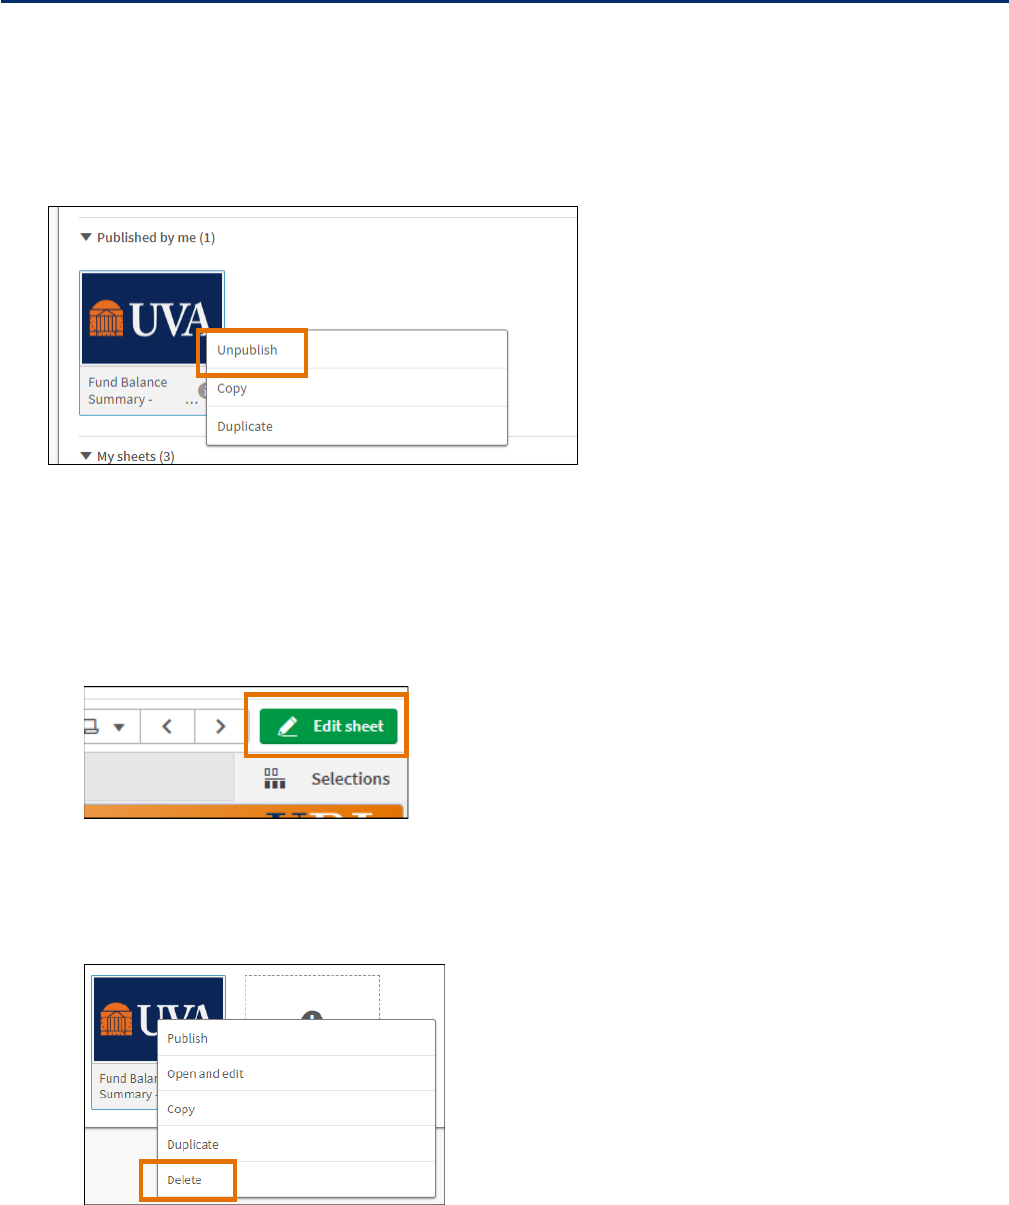
Unpublish the My sheet:
To remove a published My sheet from the Community sheets, you can unpublish your My sheet. If you need to
make additional changes to the My sheet, then you must unpublish it.
28. Under Published by me, right-click the My sheet thumbnail.
29. Select Unpublish.
30. Click the Unpublish button.
Add changes to your My sheet:
31. Open your My sheet.
32. Click Edit sheet at the top right-hand side of the screen.
Delete the My sheet:
33. Under My sheets, right-click the My sheet thumbnail.
34. Select Delete.
35. Click the Delete button.
